What is Power Automate?
Power Automate is a product from Microsoft that lets you create automated workflows between your favorite apps and services to sync files, receive notifications, collect data, and more.
Repetitive, time-consuming tasks can be automated with Microsoft Power Automate very easily and without the need to create code-based solutions, so they should become more and more a thing of the past.
Microsoft Power Automate provides a great level of system interoperability across many applications and services for both cloud and on-premise solutions. Using the cloud-based software tool, everyone in your organization will be able to create and implement their own business workflows and solutions to automate repetitive, sometimes tedious work to ensure that important processes are executed the right way every time.
Extensive integration with SharePoint, OneDrive for Business and Dynamics 365 enables automation directly in the context of the applications you use every day.
Power Automate provides connectors (apps/services like SharePoint, Outlook, /.) and most connectors provide pre-built triggers that you can use to start your processes.
Instead of writing code, use the point-and-click feature in Flow Designer to develop the logic for your business flows.
Trigger
Events that start a cloud flow are called “triggers”. In the following sample use case, we want to receive a notification and a
selection of options sent by a bot in Microsoft Teams when someone sends an email to a defined account with a PDF attachment. In this case, receiving an email is the trigger that starts this flow.
Demo Use Case Microsoft Power Automate
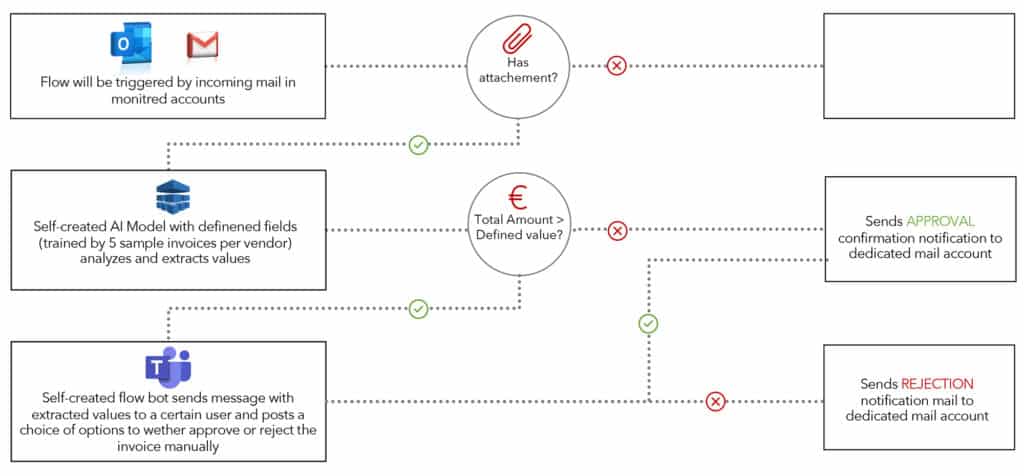
Automatic invoice approval (or rejection) notification process from a monitored inbox, triggered when an email has an attachment.
Workflow Model:
This diagram describes a simple-to-implement use case of an automated notification workflow for an invoice approval process, as needed in many organizations:
Steps for configuration & implementation of the planned workflow
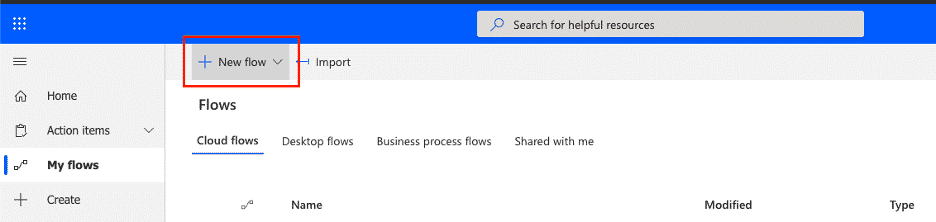
Our first step after logging in is to create a new flow in the “My Flows” section by clicking on the corresponding button.
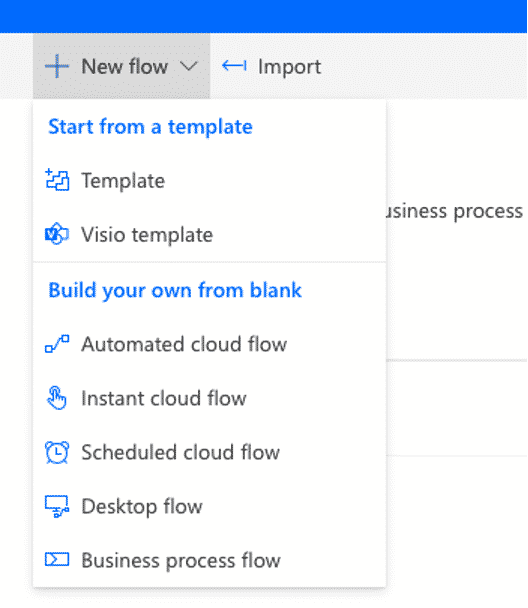
Choose between different templates, or create a workflow from scratch:
In our example, we choose the “Automated Cloud Flow” option
Import of documents & configuration of initial trigger
After a new flow is created, an Import Connector is defined and configured.

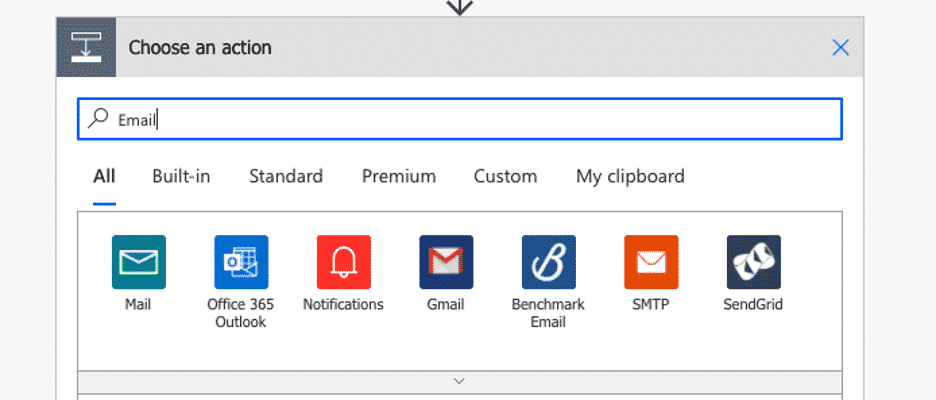
You can use the search function to browse the range of numerous apps and services for which a connector is already available for integration:
For our demonstration, we first select the connector for a Gmail-account:
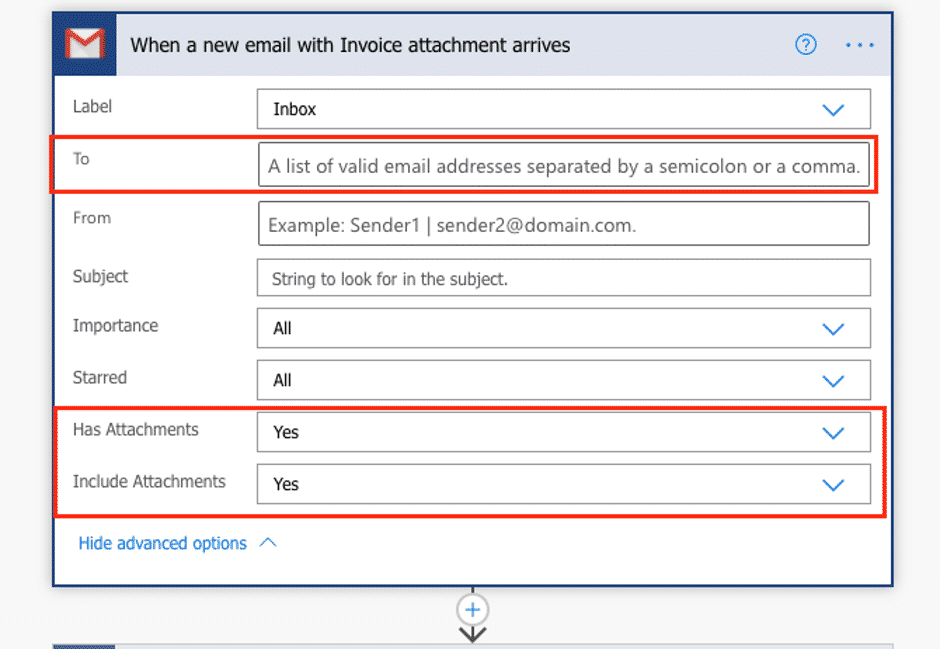
Within the connector, various configuration options are offered:
In our example, it is sufficient to define here the email mailbox that should be monitored and the specification that an email must have an attachment and that this attachment should be included.
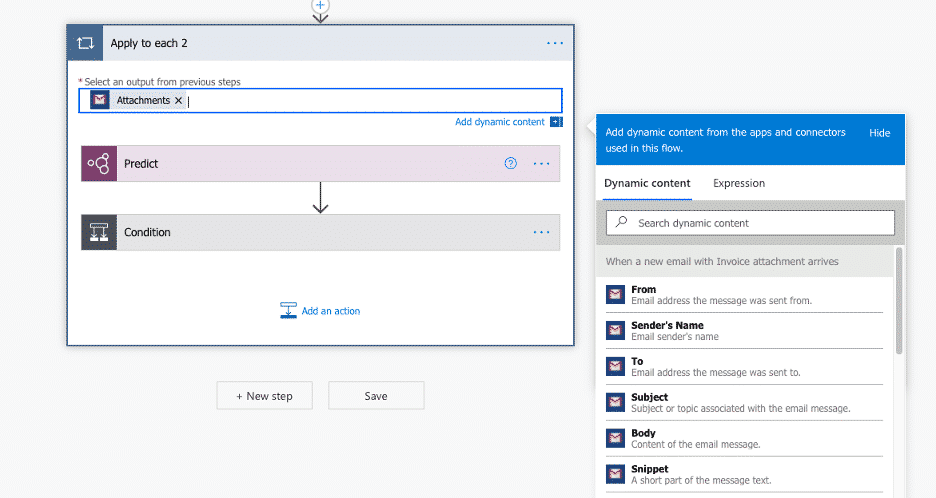
The next step is to define which of the data should be used:
So in our case the file from the attachment of the email
Automated process of document analysis and data capture

For document analysis, Microsoft offers easy-to-integrate options for automating the recognition and validation process of the data to be extracted after scanning paper documents or in the form of electronic documents.
Due to the good integrability of other systems and applications, other OCR-based capturing solutions (e.g. Ephesoft Transact) could also be integrated here.
However, for the purpose of feeding advanced document classification and data collection processes, in our example we use an AI model that we have created ourselves and learned through our own sample files.
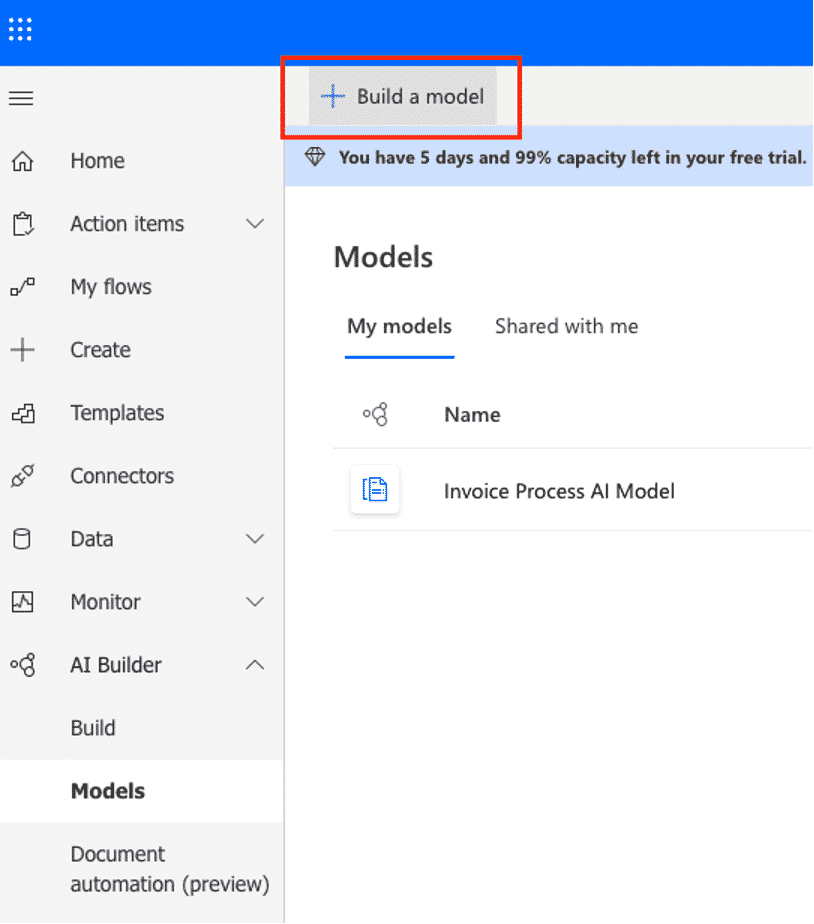
Under the menu item “AI Builder” we create a new model for this purpose.
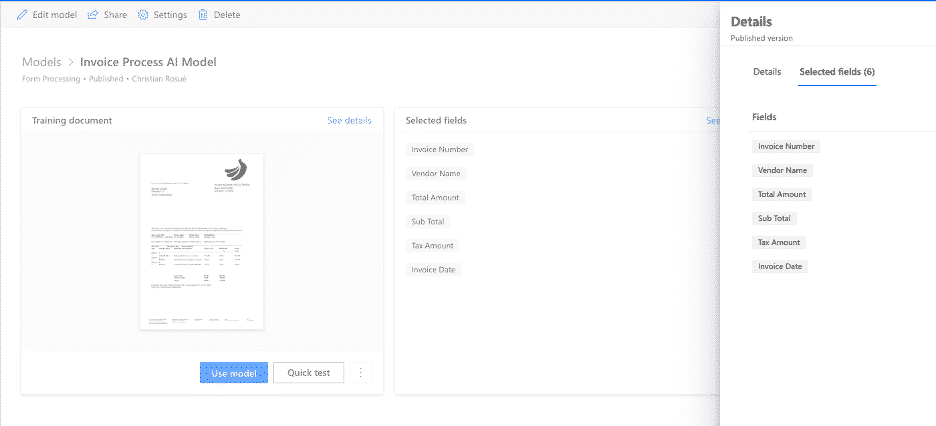
Within the edit menu, the fields for the data to be recognized can be defined and the model based on machine learning algorithms can be trained with (invoice) documents.
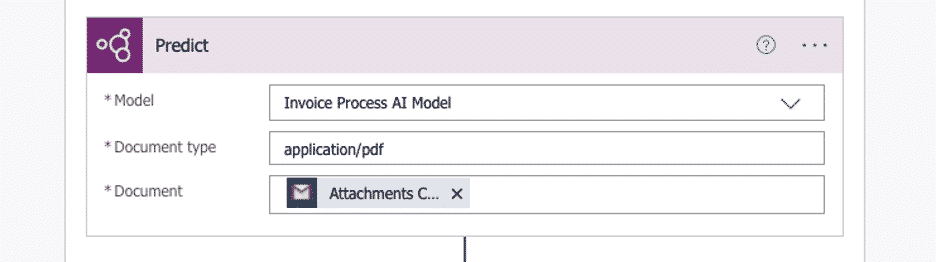
After you have finished configuring the model, it only needs to be integrated into the workflow.
Here you can also set the accepted type (e.g. PDF) of the file attachment
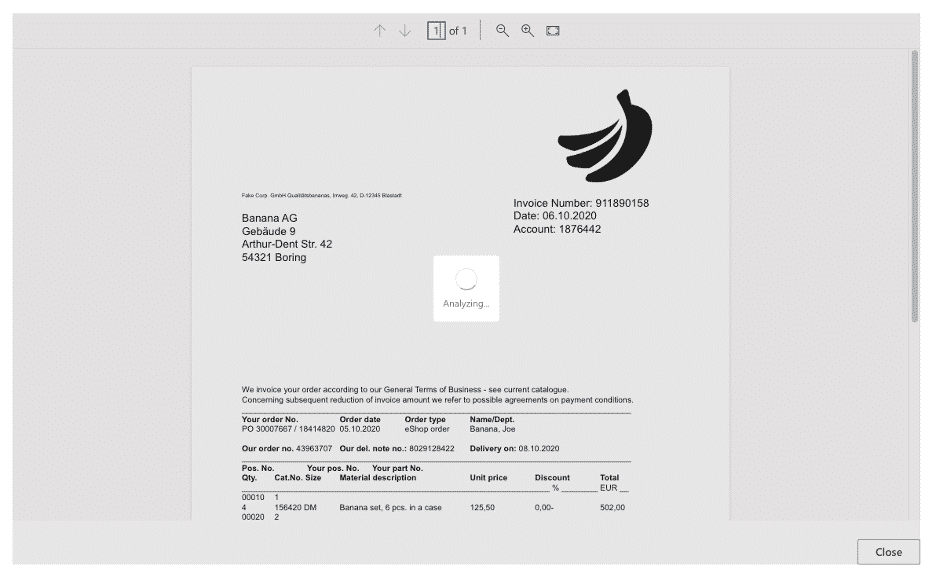
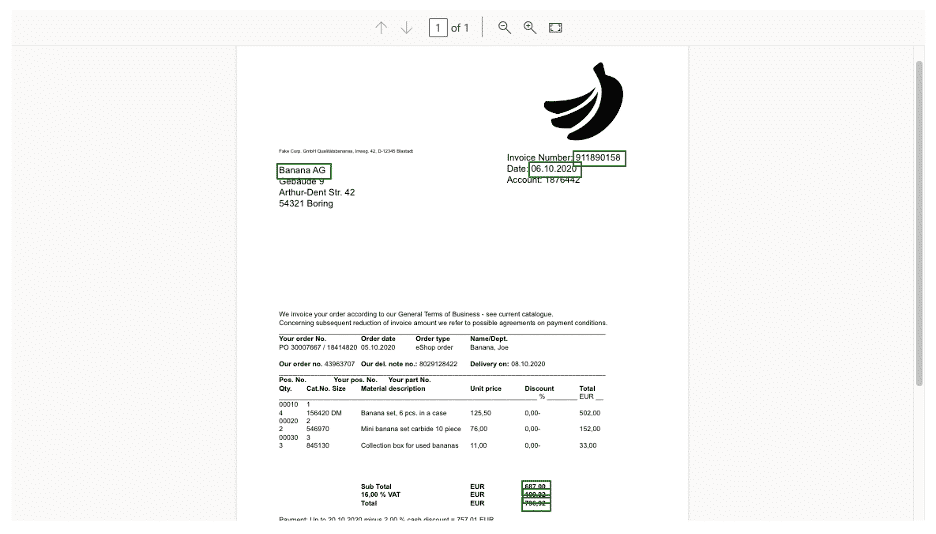
The capturing process, which runs in the background during the workflow, can and should be tested before the models created are made available:
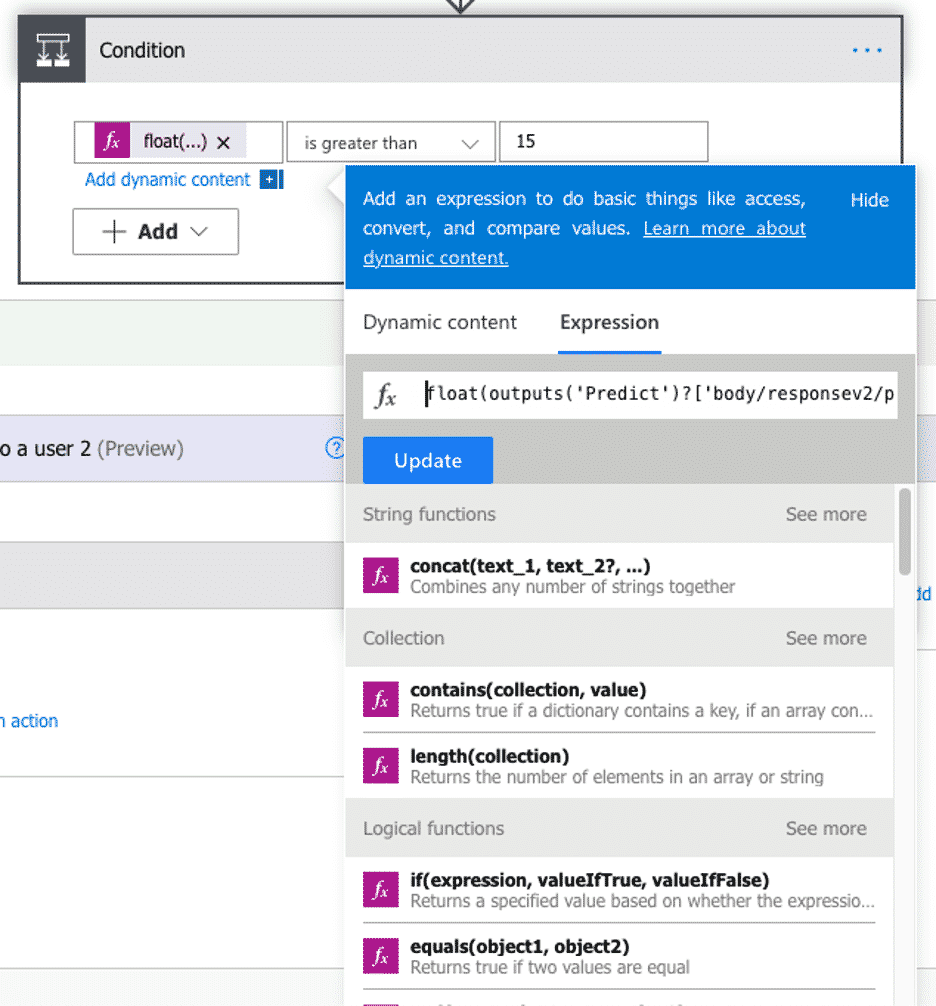
Next, various conditions could be defined. In this example, we want to check if the total amount detected is higher than a certain value.
For the matching, the type (“String”) is converted to a number format.

After that, the options (True/False) are assigned with further actions:
- Amount is higher:
A created MS-Teams bot sends a message to a specific user or group - Amount is below certain value:
A notification of automatic approval and a listing of the extracted values of the invoice is sent to an email inbox
Approval/Rejection process

If the detected amount is higher than the set value, the deposited user will receive a notification from the Microsoft Teams bot.
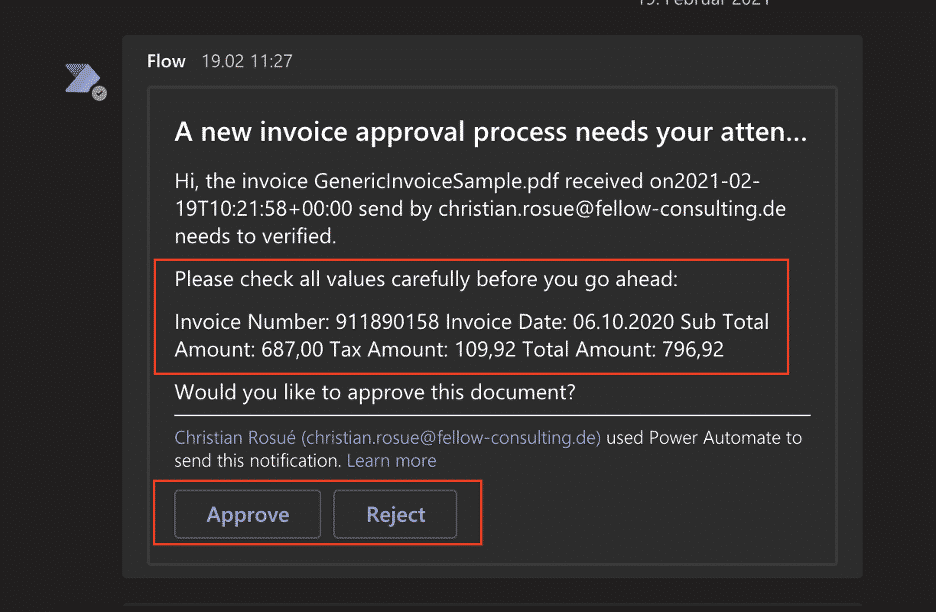
After reviewing the listed values of the invoice, this document can either be approved by clicking on the “Approve” button, or rejected by clicking on “Reject”.
In the screenshot below you can see the configuration of the Microsoft Teams RPA solution
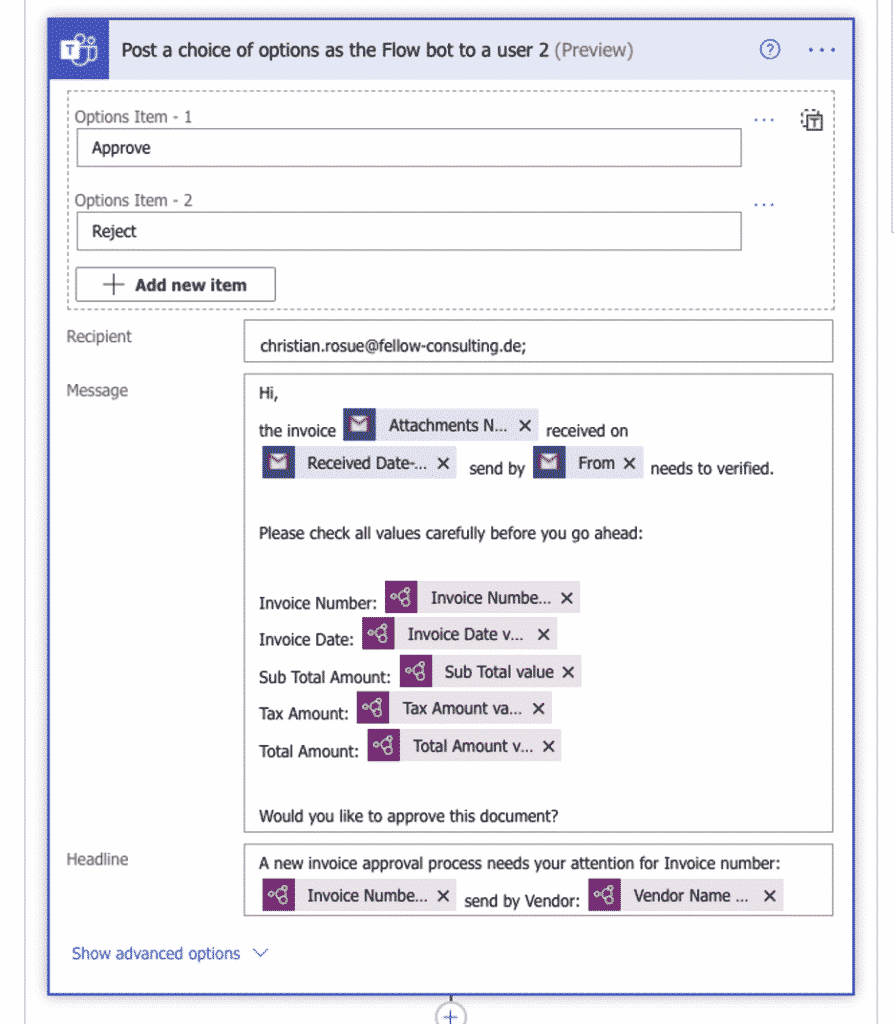
Here we store two option elements (Approve & Reject) and create a message with the values of the recognized fields.
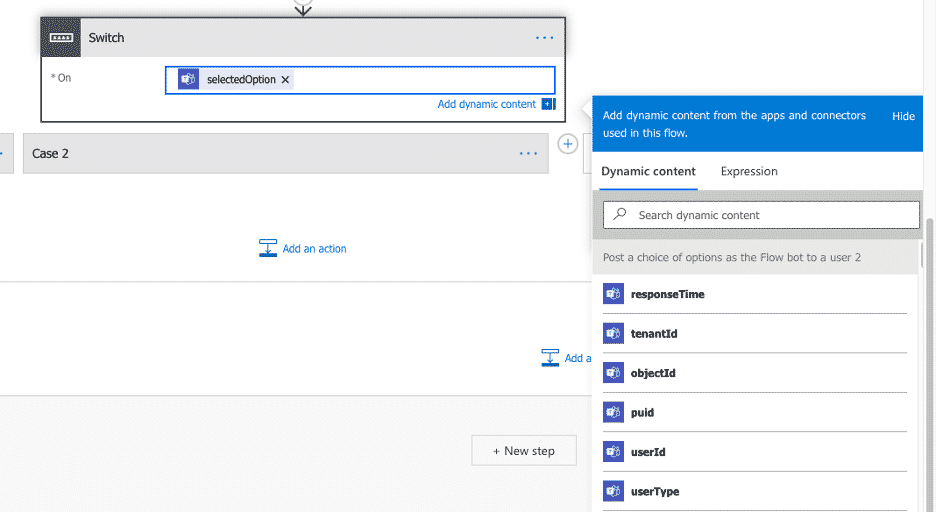
In the user interface of Power Automate, a switch is now stored which determines the actions that should follow an interaction with one of the two buttons.
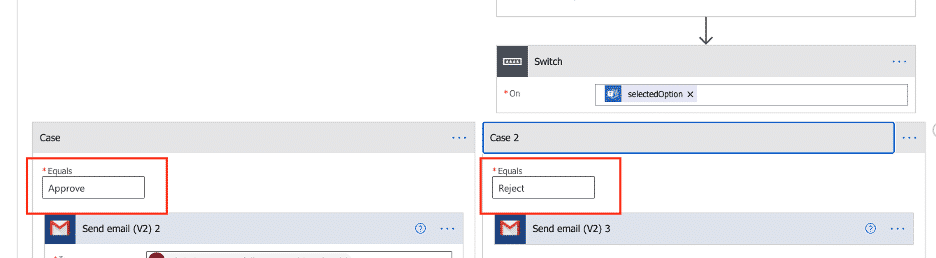

If the user clicks on the Approval button, an “Approval” notification is sent to an email account. If the user clicks on the reject button, a “Rejection” notification shall be sent accordingly.
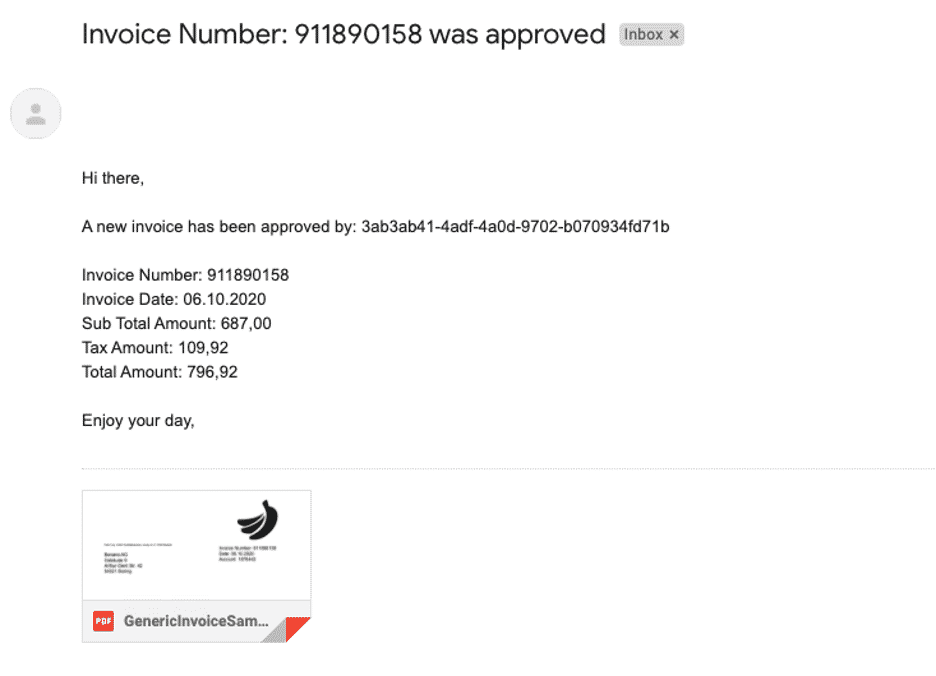
Email notification
The listed example should give you a small overview of the extensive possibilities for creating workflows and automation processes and make it a little easier for you to get started with this great tool.
Feel free to contact us for further information or questions.